In many ways, replacing a door latch is like swapping out a tire on your car. You don’t need to be a mechanic to get it done, but having a few tools and some knowledge makes it easier and less stressful. Whether it’s a Schlage latch that’s acting up or a Kwikset latch that won’t lock, this guide walks you through the process step by step, so you can tackle the job with confidence.
Understanding Door Latch Basics
Before we jump into the replacement process, let’s understand what a door latch actually is. A door latch is a mechanism that holds a door closed when it’s shut. It works in tandem with the doorknob or handle, allowing you to lock or unlock the door with a simple turn or push. In essence, it’s your door’s way of saying, “I’m secure, come on in!”
There are a few types of latches, but the most common ones you’ll encounter are spring latch, deadbolt, and privacy latch. Spring latches automatically catch on the strike plate when you close the door, while deadbolts provide extra security since they require a key or a thumb turn. Privacy latches are often used on bathroom or bedroom doors, giving you peace of mind that your personal space is protected.
Knowing the type of latch you have is crucial because it dictates the replacement process. For example, a Schlage latch might have different dimensions or installation methods compared to a Kwikset latch. Make sure to check the existing latch before purchasing a new one, as being aware of brand compatibility can save you time and effort.
Gathering Your Tools and Materials
Now that you know what you’re dealing with, let’s talk about the tools you’ll need. Honestly, you probably already have many of these in your toolbox. Here’s a quick list to get you started:
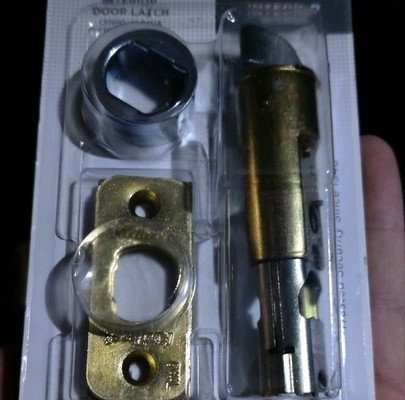
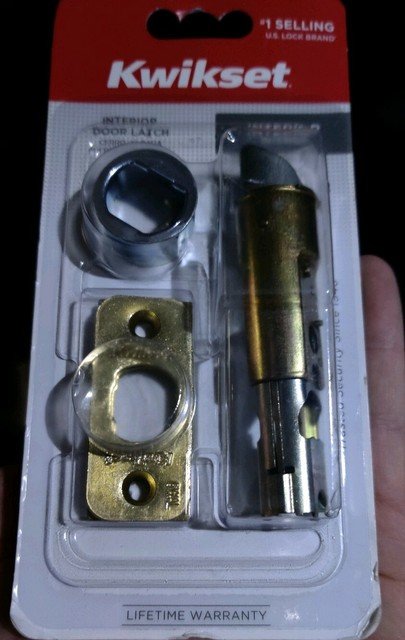
- New latch (Schlage or Kwikset)
- Screwdriver (flathead and Phillips)
- Drill (optional, for new holes)
- Measuring tape
- Pencil (for marking)
- Wood glue or wood filler (if needed)
Make sure to choose a latch that’s compatible with your door. For instance, if you’re replacing a Kwikset latch, picking up another Kwikset model will make things easier. You might be wondering if you can use a universal latch instead. While universal latches exist, they sometimes don’t fit as snugly as brand-specific ones, leading to potential issues down the road.
Once you have your tools, take a moment to gather your materials. Having everything laid out can make the process smoother, much like preparing all your ingredients before starting to cook a new dish.
Removing the Old Latch
Now comes the fun part: removing that old latch. Start by closing the door, which allows for easier access. For most latches, you’ll need to remove the screws holding the latch in place. Use your screwdriver to unscrew both the faceplate (the plate on the edge of the door) and the doorknob.
Here’s how to break it down:
1. Unscrew the Doorknob: Begin by removing screws from both sides of the doorknob. Once they’re out, gently pull the doorknob away.
2. Remove the Faceplate: Next, you’ll find screws on the edge of the door that attach the latch. Unscrew these and take off the faceplate.
3. Slide Out the Latch: With the screws removed, you should be able to slide the latch out of the door. If it’s stuck, give it a gentle tug.
As you’re doing this, keep in mind how everything is put together. If you’re a visual learner, snapping a few photos during this process can help when you go to install the new latch.
Installing the New Latch
With the old latch out of the way, it’s time to install the new one. This part is usually straightforward, but it’s all about attention to detail.
1. Prepare the New Latch: Start by positioning the new latch into the cavity where the old one was. Make sure it aligns properly with the strike plate (the metal plate on the door jamb that receives the latch).
2. Secure the Faceplate: Replace the faceplate and secure it with screws. Be sure not to overtighten, as this could warp the latch.
3. Attach the Doorknob: Now it’s time to put the doorknob back on. Line it up with the latch mechanism and secure it using the screws you removed earlier.
Take a step back and ensure everything lines up correctly. The latch should move freely when you turn the doorknob. If it feels tight or is sticking, you might need to adjust it slightly.
Testing the Functionality
Once you’ve installed the new latch, it’s essential to test its functionality. This step is crucial because, at the end of the day, you want to ensure your door opens and closes smoothly.
1. Close the Door: Gently close the door and turn the doorknob.
2. Check the Latch: Make sure the latch extends fully into the strike plate. You should hear a satisfying click when it catches.
3. Lock and Unlock: If your new latch has a locking feature, test that as well. Lock it and unlock it a few times to make sure it engages and disengages properly.
If you notice any issues during testing, don’t panic! Sometimes, just a minor adjustment is needed. If it still doesn’t work smoothly, double-check your installation to ensure everything is aligned properly.
Troubleshooting Common Issues
Sometimes, even after a seemingly perfect installation, issues can arise. Let’s look at a few common problems and how to resolve them.
– Sticky Mechanism: If your new latch feels sticky, it could be due to misalignment. Loosen the screws slightly and adjust the latch position. Tighten the screws back up once it’s in the correct spot.
– Latch Won’t Catch: If the latch doesn’t catch the strike plate properly, you may need to adjust the strike plate’s position. Loosen the screws on the strike plate and reposition it slightly, then retighten.
– Noise When Engaging: If you hear grinding or scraping noises when using the latch, there might be debris in the mechanism. Clean the area around the latch and apply a bit of lubricant for a smoother operation.
These troubleshooting tips can get you back on track. Remember, even the pros encounter hiccups from time to time!
Maintaining Your New Latch
Congratulations, you’ve installed your new door latch! Now, how do you keep it functioning as smoothly as the day you installed it? Maintenance is key.
– Regular Cleaning: Dust and debris can build up around the latch, making it stick or malfunction. Wipe the area down regularly with a soft cloth.
– Lubrication: Applying a little lubricant to the latch mechanism can help it operate smoothly. Just a drop or two every few months can make a big difference.
– Checks for Wear: Over time, latches can wear out. Keep an eye on how it operates. If you notice it getting tough to turn or if it starts making odd noises, it might be time to replace it again.
By taking these simple steps, you’ll ensure your new latch remains functioning well for a long time.
In conclusion, replacing a specific brand interior door latch like Schlage or Kwikset can feel daunting at first. However, with a little patience and the right tools, you can tackle this DIY project like a pro. This simple upgrade not only enhances your door’s security but also improves your home’s overall appearance. So grab your tools and get started—your doors will thank you!