When we talk about hinge mortise templates, you might hear names like the Kreg Hinge Mortise Template or the Milescraft Hinge Mortise Kit thrown around. These tools not only save you time but also help avoid the headaches of misaligned doors. So, whether you’re a seasoned DIYer or a beginner, learning how to use this template can make your installations smoother and more professional.
What Is a Hinge Mortise Template?
A hinge mortise template is a handy tool designed to help you create the perfect recesses for your door hinges. Think of it as a stencil that you position on your door. It provides a guide for cutting out the material so that the hinge fits snugly. You’ll often see these templates made of durable plastic or metal with pre-measured markings that correspond to standard hinge sizes.
Most templates come with adjustable features, allowing you to switch between different hinge types. This flexibility means you can use the same template for various projects without needing to invest in multiple tools. The beauty of using this tool lies in its ability to deliver consistency—so each hinge you install will look professional and function smoothly.
Why Use a Hinge Mortise Template?
You might wonder, “Why can’t I just measure and cut by hand?” While that’s possible, it often leads to mistakes and requires extra adjustments. A hinge mortise template helps eliminate those errors. Here are a few reasons why it’s worth the investment:
- Precision: The template ensures that every cut is uniform, which is crucial for proper alignment.
- Time-saving: By speeding up the measuring and cutting process, you can complete your project much faster.
- Versatility: Many templates accommodate different hinge sizes and types, making them useful for various door installations.
Ultimately, using a hinge mortise template means less frustration and a higher quality finish. Imagine the satisfaction of swinging that door open for the first time and knowing it was done right!
Choosing the Right Hinge Mortise Template
When selecting a hinge mortise template, consider a few important features. Honestly, not all templates are created equal, and finding the one that fits your needs can make a world of difference.
First, check the material. Metal templates tend to be more durable, while plastic ones are often lighter and easier to handle. Next, think about the adjustability. A template that allows for different hinge sizes means you won’t need to buy multiple tools for various projects. Lastly, read reviews to see how others rate the templates for accuracy and ease of use.
A good example is the Kreg Hinge Mortise Template, which features built-in stops for various hinge sizes, making it a versatile choice for many DIY enthusiasts.
Preparing for Installation
Before you dive into the actual installation, it’s important to prepare adequately. This stage is crucial—think of it as laying the groundwork for a solid foundation.
Start by gathering your materials: the hinge mortise template, a router (or chisel if you’re going the old-school route), screws, a drill, and measuring tools. Ensure you have a clean and well-lit workspace. Lay out your door and frame to visualize where the hinges will go.
Use a measuring tape to mark the desired height for the hinges on both the door and frame. Remember, most standard doors have hinges located about 7 inches from the top and 11 inches from the bottom. Then, mark these points clearly using a pencil so you can easily align your template later.
How to Set Up Your Hinge Mortise Template
Setting up the hinge mortise template might seem tricky, but it’s straightforward once you break it down. Here’s how to do it step-by-step:
1. Align the Template: Place the template on the door panel, making sure it lines up with your marks. Some templates may have magnetic strips or clamps for a secure hold.
2. Secure the Template: Use clamps to hold the template steady, preventing it from moving during cutting. This step is essential; any movement can lead to imperfect cuts.
3. Double-Check Your Alignment: Before you start cutting, take a moment to ensure everything is lined up correctly. Check both the height and the horizontal alignment to avoid any missteps.
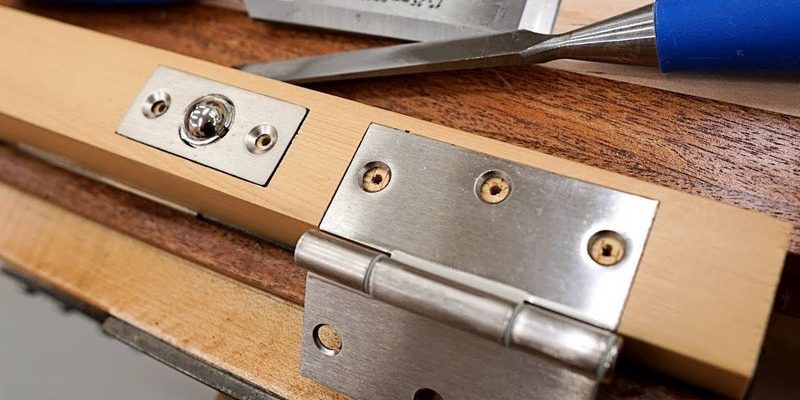
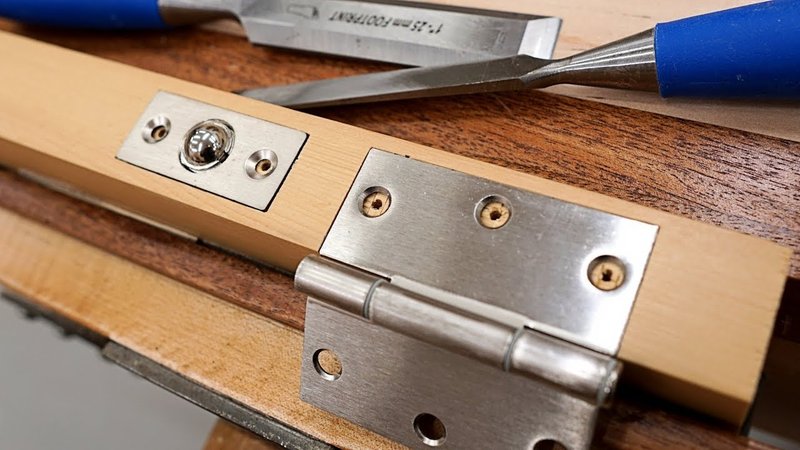
4. Cut the Mortise: With your router or chisel, carefully follow the template’s guide to cut out the mortise. If using a router, go slowly, and check your depth frequently to avoid cutting too deep.
Installing the Hinges
Once your mortises are cut, it’s time to install the hinges. Here’s how to do this effectively:
1. Position the Hinges: Place each hinge into its respective mortise. The hinge should sit flush with the door surface. Use a level to ensure it’s straight.
2. Mark the Screw Holes: With the hinge in place, use a pencil to mark where the screws will go. This step is crucial for proper installation.
3. Drill Pilot Holes: Before screwing in the hinges, drill pilot holes to avoid splitting the wood. This is especially important with harder woods or when installing into a door frame.
4. Secure the Hinges: Finally, screw the hinges into place. Make sure they’re snug but avoid overtightening; this can warp the wood.
Troubleshooting Common Issues
Even with all the preparation, you might encounter a few hiccups along the way. Here are some common issues and how to resolve them:
1. Hinges Not Aligning: If your hinges aren’t lining up correctly, double-check your mortise cuts. Misalignment could happen if the template moved during cutting.
2. Too Deep of a Cut: If you notice the hinge sits too low, you may have cut too deep. In this case, you might need to add a shim or adjust your cutting technique for future installations.
3. Squeaky Hinges: After installation, if your doors squeak, it may simply need lubrication. A bit of WD-40 or even household oil can do the trick.
Remember, every project is a learning experience! The more you practice, the more skilled you’ll become.
Final Thoughts on Using a Hinge Mortise Template
Using a hinge mortise template for door installations can significantly enhance the quality of your work. With precision, efficiency, and the right tools, you can achieve professional-looking results without being a pro yourself. Whether you’re tackling one door or an entire house, having the right template makes all the difference.
Take your time, follow the steps carefully, and don’t be afraid to make mistakes; they’re part of the learning process. Before you know it, you’ll be installing hinges like a seasoned expert! So grab your tools and get to work; you’ve got this!