Let’s say you just picked up a stylish new Schlage entry handleset, only to discover the screws and tailpieces barely reach through your hefty new door slab. You’re not alone—this is a classic DIY curveball. The good news? With the right extension kit and a little patience, you can absolutely make it work (and end up with a door that’s just as secure as any standard install). Here’s what you need to know.
Why Door Thickness Matters For Handleset Installation
The truth is, most handlesets are “one-size-fits-most”—and by “most,” manufacturers usually mean doors that are between 1-3/8″ and 1-3/4″ thick. But plenty of exterior doors, especially newer or custom ones, can tip over 2 inches. Here’s the thing: the screws and spindle pieces included in your typical handleset just aren’t long enough for those beefier doors. If you try to force the install, you might end up with a loose, wobbly handle, a lock that won’t engage, or stripped hardware. Not exactly the kind of security or curb appeal anyone wants.
You might be wondering, “Can’t I just buy longer screws at the hardware store?” Sometimes, sure—for interior doorknobs, this trick can work. But handlesets often require matched extension kits, which include properly sized screws, tailpieces, and sometimes new spindles or connection sleeves. If you skip the right hardware, you risk problems with the latch or lock mechanism, and that’s a headache you don’t want.
When you’re working with a thicker door, paying attention to these little details makes all the difference. Don’t worry—once you’ve got the right kit and follow a few extra steps, installing your handleset is totally within reach.
Tools And Materials You’ll Need
Before you start, let’s lay everything out on the table—literally. You’ll need some standard tools, a few easy-to-miss extras, and your handleset brand’s extension kit (this is the real secret sauce for thick doors).
- Drill with standard bits (usually 1/8″ and Phillips head)
- Tape measure and pencil for marking screw holes
- Screwdriver (manual or electric, but manual gives you more control when tightening)
- Handleset extension kit to match your brand and specific door thickness
- Level so your handleset doesn’t end up crooked
- Wood chisel and mallet for fine-tuning the latch plate or strike plate fit
- Safety glasses—seriously, metal shavings are no joke
Sometimes, your kit will come with a template for marking holes. If it doesn’t, you might have to make your own using the old handleset as a guide. Don’t forget to grab the right batteries if your handleset is a smart model! And if you’re using a universal extension kit (instead of a brand-specific one), double-check compatibility before you start drilling.
Getting The Right Extension Kit For Your Handleset
Let me explain why this is such a crucial step. Not all handleset extension kits are created equal. For example, if you’re working with a Schlage handleset, you’ll need a Schlage thick door kit—one that’s made for your lock model and door thickness. Other brands like Kwikset and Baldwin all have their own flavors of extension hardware. Using a random or universal kit might get your handle attached, but your latch, lock, or code pad might not work right—and that’s asking for trouble.
Here’s what to look for in an extension kit:
- Screws—usually the most obvious issue for a thick door. They need to be the correct diameter and threading.
- Tailpieces (lock spindles)—these connect the outside and inside levers or key cylinders. The wrong length and your lock may not turn at all.
- Spindle sleeves or collars—for smart or code-entry locks, the electronics may need an extension collar or “sync” adapter to connect the keypad properly.
You might be tempted to “make it work” with what you have, but investing in the official extension kit is worth every penny. Brands like Schlage and Kwikset sell these online, and some locksmiths keep them on hand. Bring your handleset’s model number and your door measurement (to the nearest 1/16 inch), and you’ll have the right parts for a stress-free install.
Pro tip: Always confirm the kit works with your specific handleset model, especially if you have code or battery-powered features. A mismatch here can leave you locked out (literally!).
Step-By-Step: How To Install A Handleset On A Thicker Exterior Door
Now for the main event. Installing a handleset on a thick door isn’t wildly different from a standard install, but there are a few extra things to watch for. Here’s how to do it, one step at a time:
1. Measure And Prep
Start by measuring the exact thickness of your door. Don’t just eyeball it—use a tape measure and write it down. Remove the old handleset if there is one. Clean the holes and check that they line up with your new handleset or template. If your kit includes a template, tape it on and mark all screw and spindle holes.
Sometimes, you’ll need to enlarge the holes slightly to fit the longer tailpieces or connecting rods. Go slow and keep your drill perpendicular to the door’s edge.
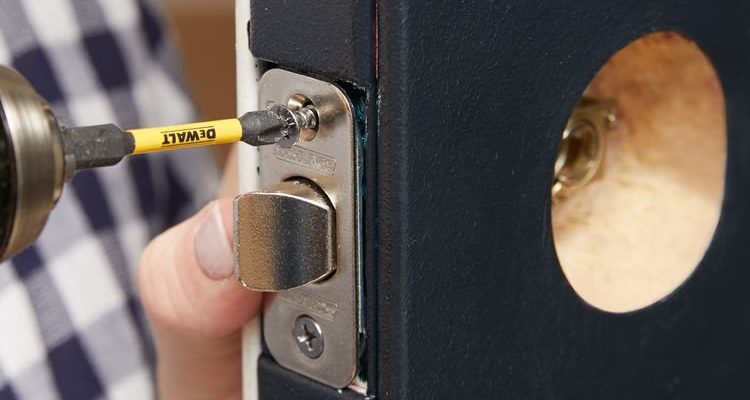
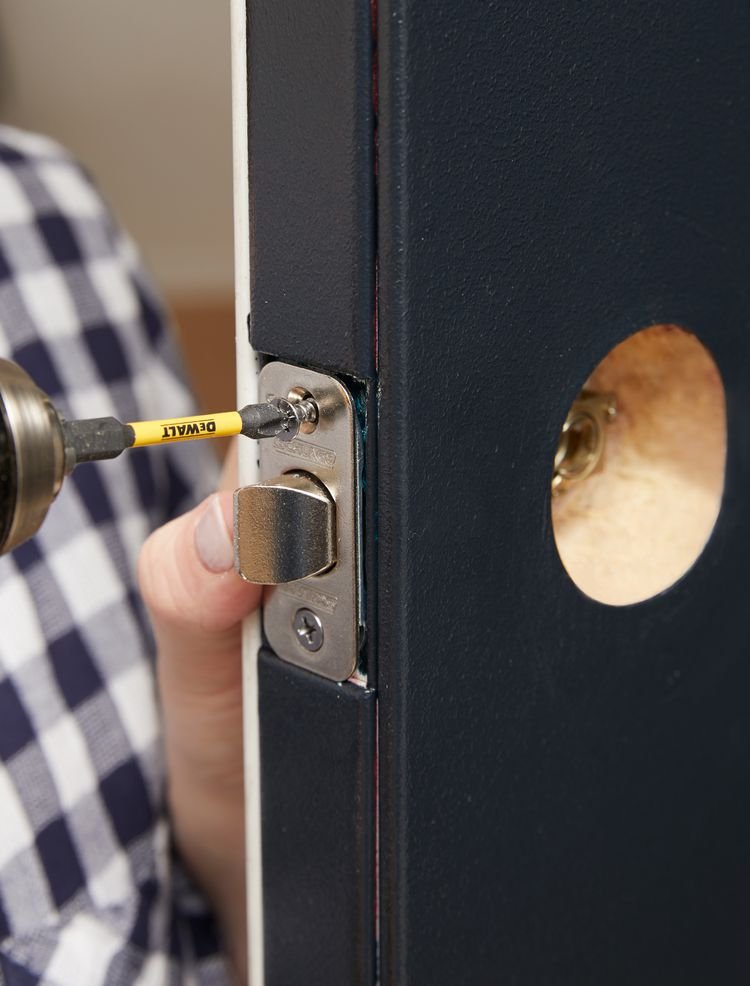
2. Install The Latch And Deadbolt
Most modern handlesets—like those from Schlage or Kwikset—use a rectangular latch and deadbolt. Slide these into the edge of the door, making sure the bevel faces the correct direction (so the door closes smoothly). Set them in place but leave the screws slightly loose until the final fit.
This is when you’ll use any included extension collars: they help “sync” the latch with the longer screws and spindles needed for thick doors.
3. Attach The Exterior Handleset
Push the outside handle and lock assembly through the holes. Feed the longer tailpieces or spindle rods through the latch mechanisms. The “battery” compartment or code pad, if you’ve got a smart handleset, will also need to line up with any extension sleeves included in your kit. Double-check all connections—nothing should feel forced.
4. Secure The Interior Plate And Handle
Line up the inside handle and/or thumb turn. Use the longer screws from your extension kit, threading them through the interior plate into the exterior handle. Tighten firmly, but not so much that you strip the threads or warp the faceplate.
If you get stuck, don’t force it. Sometimes the spindles or screws need a bit of wiggling to line up—this is a common issue, especially on doors thicker than 2 inches.
5. Test Everything Before Final Tightening
Turn the handle, thumb turn, and (if you have one) enter a code or use the key to test the lock’s action. The latch should extend and retract smoothly, and the lock should engage cleanly. If anything feels stiff or doesn’t move right, loosen the screws slightly and adjust the alignment before tightening everything down.
Common Problems And How To Fix Them
Installing a handleset on a thick door isn’t hard, but there are a few classic problems you might run into—especially if you’re working with code-entry or battery-powered models.
- Screws won’t reach or catch: Double-check that you’re using the right screws from your extension kit, not the ones from the original package.
- Spindle or tailpiece is too short: Make sure you’re using the extension piece. For smart locks, don’t forget any code sync adapters or sleeves.
- Lock mechanism feels stiff or won’t engage: Loosen the screws and check if everything is lined up cleanly. Thicker doors can throw off the alignment by just a hair.
- Battery or electronics won’t work (for smart handlesets): If you’re using a battery-powered keypad, make sure all extension adapters are installed and the wires aren’t pinched or stretched. Test the code function before final assembly.
If you’re truly stuck, don’t be afraid to call the manufacturer’s support line. They’ve heard every weird install story and can usually walk you through a solution—especially if it’s a common remote or code sync issue.
Comparing Handleset Brands And Kits For Thick Doors
You might be wondering if there’s much difference between brands when it comes to thick door installation. Honestly, some make it easier than others. Schlage, for instance, usually offers dedicated thick door kits for most of their residential handlesets, and their instructions tend to be clear and beginner-friendly. Kwikset and Baldwin also have solid support, but sometimes their kits are harder to find in stores and require special ordering.
Universal extension kits exist, but they’re not always a perfect fit. If you have a battery or code-enabled handleset, stick with your brand for the best chance of a smooth “reset” and pairing process. Using brand-specific kits helps avoid “troubleshooting” headaches down the line, since the manufacturers design all the parts to work together.
If you’re buying new hardware for a thick door, consider asking about “thick door compatibility” up front. Some brands sell handlesets that work for both standard and thick doors right out of the box. It’s worth checking before you jump into the install.
Tips For A Smooth, Secure Handleset Install
A few final tips can make your handleset install much more enjoyable. First, always triple-check that you have all the extension parts before you start—nothing kills your momentum like missing screws or a tailpiece that’s too short. Lay everything out in organized groups so you don’t end up grabbing the wrong part mid-install.
Keep your tools close, and don’t rush. If you need to adjust the latch plate or strike, use a wood chisel for a snug fit. And if your handleset has a built-in battery pack or code sync feature, make sure to install the batteries and test the code before screwing everything down tightly.
Most importantly, trust your gut. If something feels off—like the handle wiggles, the lock won’t turn, or the battery won’t connect—pause and double-check your steps. A secure, smooth install is better than a quick one.
Wrapping Up: Confidence In Your New Handleset
When all’s said and done, installing a handleset on a thicker exterior door is about working smarter, not harder. The right extension kit, a good set of tools, and a steady approach can save you hours of frustration down the line. Whether you’re going with Schlage, Kwikset, or another brand, the process is pretty straightforward once you know what to expect—and those tiny details like spindle length, code connection, or battery sync really do matter.
So, take your time, follow each step, and don’t be afraid to ask for help if you hit a roadblock. The end result? A rock-solid, stylish handleset that actually fits your thick door, looks great, and works perfectly—making your home just a little bit safer and more welcoming every time you walk in.