Most modern handlesets, like those from Schlage, Kwikset, or Yale, are built with user-friendly designs. Still, every brand has its quirks—little details in screws, escutcheons, or hidden latches that can throw you for a loop if you’re not ready. Think of it like swapping out a bike pedal: the task is small, but the right steps make all the difference.
What Is an Exterior Lever on a Handleset?
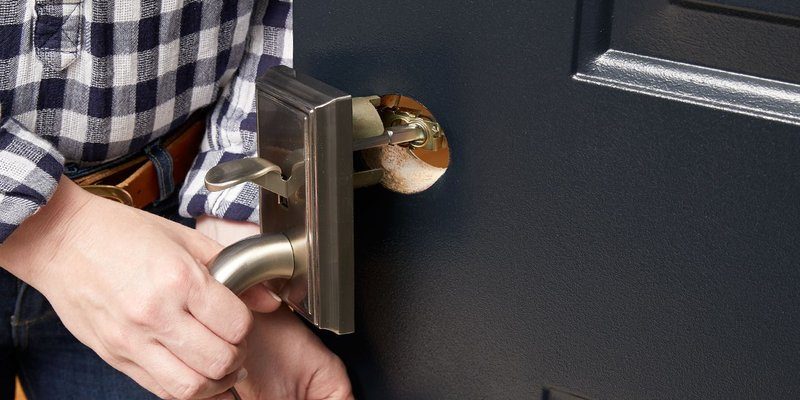
When people talk about a door “handle,” they’re often thinking of the lever, but the full setup is called a handleset. The exterior lever is the part outside your door that you actually grab and turn (or push down) to open it—usually paired with a deadbolt at the top for extra security. If you’re standing at your front door, the lever is what you reach for first.
Brands like Kwikset and Schlage kit out their handlesets with a variety of lever shapes: some curve gently, others stick out straight, but all serve the same purpose. These levers face the elements every day—rain, grime, fingerprints, and even pet claws. After years of use, it’s normal for the lever to loosen, corrode, or even stop working altogether.
You might notice trouble when the lever doesn’t return to position, feels floppy, or requires a hard push. Replacing it keeps your entryway secure and smooth. And you won’t have to muscle open your door just to grab the mail.
When and Why Should You Replace It?
Here’s the thing: door levers don’t last forever. Even the fanciest, priciest models aren’t immune to wear and tear. You might be wondering why you can’t just tighten a screw and call it a day. Sometimes you can—but certain problems signal it’s time for a full replacement.
- Excessive wobbling: If the lever jiggles no matter how much you tighten it, the internal mechanisms may be damaged.
- Sticking or jamming: Handles that don’t spring back or get stuck can point to broken springs or internal parts.
- Corrosion: Outdoor handles face weather, salt, and dirt. Rust isn’t just ugly—it can mess with the lock, too.
- Broken levers: If the lever snaps off or cracks, there’s no safe way to repair it.
Replacing the exterior lever doesn’t just fix annoyances. A damaged lever is a security risk. It also makes your door look tired and neglected, which can be a turnoff (pun intended) for visitors—even before they ring the bell.
What Tools and Parts Will You Need?
Before you start yanking off pieces, let’s talk prep. You’ll need a few tools—most homes already have them lying around, but it’s smart to double-check. The last thing you want is to get halfway into the job, only to realize you’re missing a Torx driver or the right replacement lever.
- Phillips and flathead screwdrivers: Most levers use standard screws, but double-check your set first.
- Allen wrench (hex key): Some brands, like Schlage, secure their levers with a tiny set screw underneath.
- Replacement exterior lever: Make sure it matches your handleset’s brand and model, or look for a universal kit. If you’re not sure, bring the old one to the hardware store for comparison.
- Lubricant: A quick spray on moving parts can help prevent future sticking.
- Tiny tray or cup: Screws love to roll under furniture. A dish keeps everything in one place.
Strong suggestion: check your handleset’s brand (Schlage, Kwikset, Yale, or another). Some models are easier to work with, while others have sneaky screws or special plates. A little research up front will save you time and hassle.
Step-by-Step Guide: Removing the Old Exterior Lever
Let me explain: even if you’re not handy, swapping out a lever isn’t rocket science. Here’s a clear, beginner-friendly walkthrough. Take your time and don’t force anything if you hit resistance.
- Unlock the door and open it. It’s safer and gives you space to work.
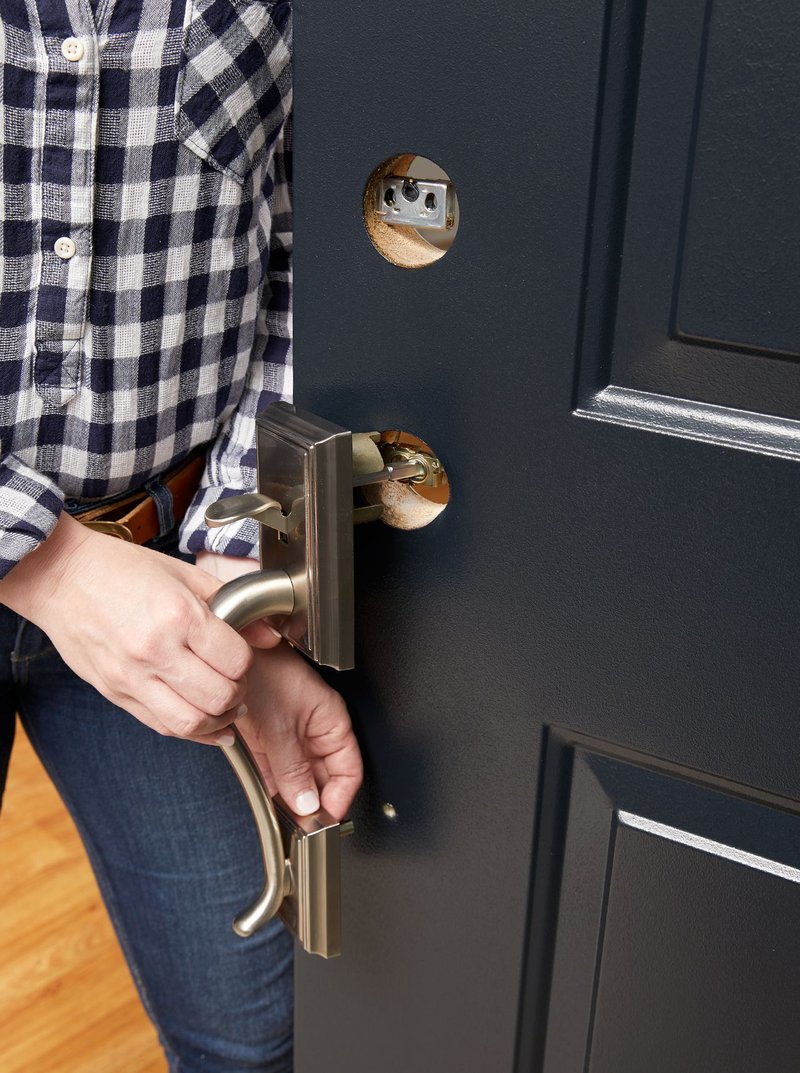
- Locate the screws: Look on the inside portion of the door—usually just above or below the interior handle or plate. If you can’t see any, check for a small set screw beneath the lever itself.
- Loosen the screws: Use your screwdriver or Allen wrench to back out all visible screws. Hold the lever steady so it doesn’t drop unexpectedly.
- Remove the lever: Gently pull the exterior lever free. If it’s stuck, wiggle it a bit. Sometimes, there’s a tab or latch to press before removing. (Check your brand’s manual if it’s stubborn.)
- Inspect the spindle and mechanism: Now’s a good time to wipe away dust, add a drop of lubricant, and make sure no parts are broken inside.
You might be surprised how simple it feels after the first time. Take a photo before disassembly, just in case you forget how it all lines up.
How to Install the New Exterior Lever
Now for the fun part: popping on your fresh lever and making your entryway feel brand-new again. Here’s how to get it right from the start:
- Align the spindle: Slide the new lever onto the spindle or post, making sure it sits flush with the door. The lever should point in the correct direction (down or out), matching the orientation of the old one.
- Tighten the screws: Insert the screws you removed earlier and secure them. If your kit includes new screws, use those. Don’t overtighten—just firm enough so the lever feels steady and doesn’t wiggle.
- Test it out: Close the door and make sure the lever operates smoothly from the outside. If it sticks or feels stiff, double-check alignment and loosen the screws a tiny bit before trying again.
- Reinstall any trim or covers: If your handle had decorative plates, snap or screw them back into place. These keep dust out and finish off the look.
Here’s a tip: if the lever feels “off” or doesn’t match the interior handle’s angle, you may have the wrong part (it happens). Most hardware stores will let you exchange a mismatched lever, especially if you bring the old one as a sample.
Common Problems and Troubleshooting Tips
Even with careful installation, little hiccups happen. Here are a few common issues when replacing the exterior lever on a handleset—and how you can troubleshoot them fast.
- Lever feels loose: Double-check the set screw or mounting screws. Sometimes, they look tight but need one more slight turn. If it keeps loosening, look for stripped threads or a worn spindle—it might be time for a full handleset replacement.
- Lever sticks or jams: Try adding a dab of lubricant to the mechanism. Still stuck? Remove the lever and check for debris or bent parts.
- Lever won’t fit: Universal levers are handy but not perfect. If the shape or mounting doesn’t match your door, you may need to order a brand-specific part.
- Can’t find all the screws: Some handlesets hide screws under decorative covers; gently pry these off with a flathead screwdriver.
*Pro insight: If you’re replacing a modern electronic handleset (like a Schlage Connect with code and sync features), double-check that the lever swap doesn’t affect the battery or remote locking mechanism. Always test every function before closing the job.*
Brand Comparisons: Kwikset vs. Schlage vs. Universal Levers
Not all levers are made equal. You might be weighing a brand-specific replacement—like a Kwikset or Schlage lever—or considering a universal solution. Here’s how they stack up:
Brand levers are like factory parts on your car—they fit perfectly, look right, and maintain the original feel. Universal levers are more like after-market options: flexible, sometimes cheaper, but a little less precise.
- Kwikset: Known for simple snap-in levers, most models are beginner-friendly. Screws are usually visible and accessible.
- Schlage: Often uses set screws hidden under the lever or a decorative collar, which can trip people up. Quality is solid, but pay attention to orientation and part numbers.
- Universal levers: Handy when your handleset is discontinued or hard to match. Watch for compatibility issues—always measure and compare before buying, especially the spindle size and lock alignment.
Here’s the thing: if your handleset has high-tech features (like a smart lock with pair, code, or reset functions), stick with the original brand unless the universal kit specifically supports those systems.
Maintenance Tips for a Long-Lasting Lever
After all this effort, you probably want your new exterior lever to last. Luckily, keeping it in great shape doesn’t take much—just a little routine care. Here are some habits to build:
- Wipe down regularly: Weather, fingerprints, and dust can wear finishes down. A quick wipe with a damp cloth (no harsh chemicals!) keeps it looking sharp.
- Lubricate yearly: Every spring or fall, dab a little graphite or silicone-based lubricant in the moving parts. Oil-based stuff attracts dust, so skip that.
- Tighten screws: Once or twice a year, check that the mounting and set screws are snug. Doors flex with season changes, so it’s normal for things to loosen up.
- Check for corrosion: If you spot early rust, a bit of fine steel wool or a baking soda paste can help. Address it right away so it doesn’t get worse.
Taking these steps is a tiny chore compared to fighting with a stubborn handle on a rainy morning.
When to Call a Pro (And Why It’s Sometimes Worth It)
Let’s be honest: not every DIY goes off without a hitch. If you try all the tricks and the lever still refuses to work—or if your handleset is part of a complex security system with sync, code, or remote entry features—it may be time to call in a professional locksmith.
- Advanced locking systems: Electronic handlesets can be picky. Messing up a wire or battery terminal could mean reprogramming the entire lock.
- Older or custom doors: If your door is vintage, extra-thick, or oddly shaped, a professional has the tools and know-how to customize the fit safely.
- Security concerns: A loose lever or poorly fitting lock can make your home vulnerable. Pros guarantee everything’s installed to spec.
Honestly, there’s no shame in passing off the tough jobs. Sometimes the cost of a quick pro repair is worth it for peace of mind and a job done right.
Wrapping Up: A Simple Fix With Big Impact
Swapping out the exterior lever on a handleset feels like a small job, but it has a big effect on your daily routine—and your home’s curb appeal. Whether you’re working with a Kwikset, Schlage, or a universal lever replacement, taking your time with proper steps saves you future headaches. If you get stuck along the way, don’t stress; even pros have to troubleshoot stubborn screws or tricky alignment now and then. Taking care of your door hardware is one of those little victories that just makes life smoother. And honestly, once you’ve handled it yourself, you’ll look at every entryway with a bit more know-how and confidence.