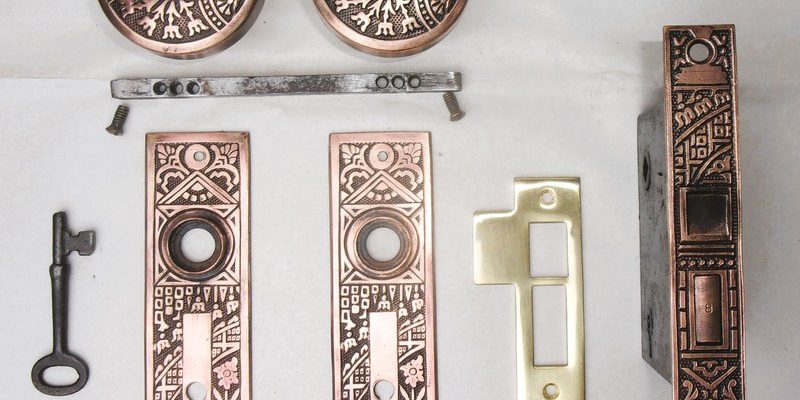
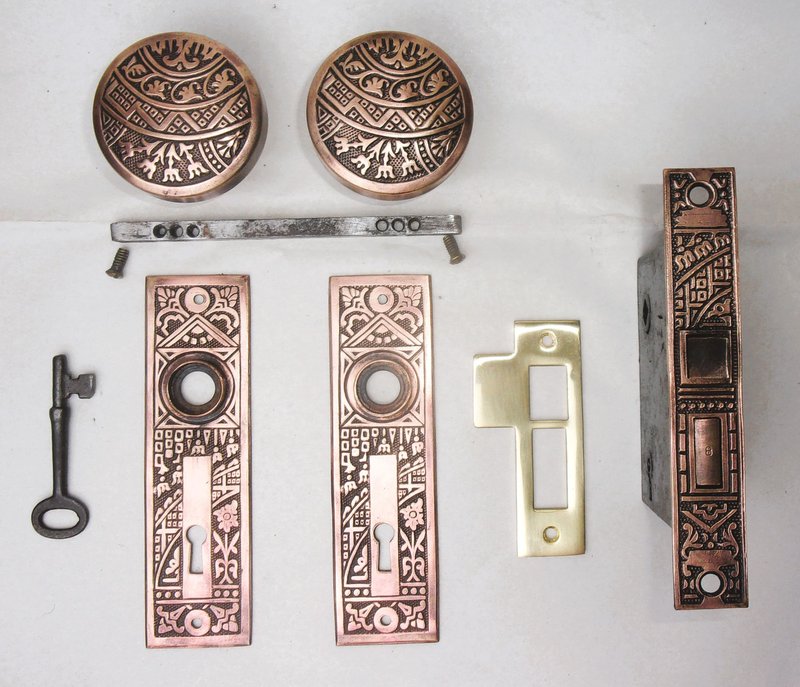
Backplates come in various styles, shapes, and materials, so there’s something for every taste, whether you prefer a modern look or a more vintage vibe. Installing them is often simpler than you might think, and the results can elevate the look of any room. Let’s dive into the why and how of backplate installation for interior door knobs!
Why Use Backplates for Door Knobs?
Backplates aren’t just decorative; they offer a blend of style and function. First, they protect your door’s surface from wear and tear. If you’ve ever noticed marks or scratches where your door knob has been, you know how frustrating that can be. The backplate acts as a shield, taking the brunt of any damage.
Beyond protection, backplates can enhance the aesthetic appeal of your doors. Think of them as the jewelry of your doorway. They frame the knob beautifully and add a touch of sophistication. Whether you choose a sleek, modern design or a more ornate vintage style, the right backplate can tie the entire room together. You might be wondering if it’s really worth the investment, and the answer is a resounding yes. After all, your home deserves every ounce of flair it can get!
Choosing the Right Backplate
Not all backplates are created equal, and selecting the right one for your door knobs is essential. Start by considering the style of your existing door hardware. If you have modern hardware, a minimalist backplate will complement it nicely. On the other hand, if your interior leans more towards traditional or rustic, opt for a more embellished plate.
Next, think about size. A backplate should be proportionate to your knob; too large, and it can look awkward; too small, and it may not serve its purpose effectively. Most backplates come in standard sizes, but it’s always a good idea to measure your knobs first. You wouldn’t want to outfit a petite knob with a hefty, overbearing plate, would you?
Lastly, consider the material. You can find backplates in metal, plastic, or wood, and each offers a different vibe. Metal provides a sleek and modern appearance, while wood can add warmth and texture. Think about the overall feel of your space, and choose a material that enhances it.
Tools You’ll Need for Installation
Ready to tackle this project? Before you get started, gather a few essential tools. Here’s a quick list that will make the installation process smooth:
- Screwdriver: A standard screwdriver works for most knob and backplate installations.
- Measuring Tape: To ensure everything is aligned perfectly.
- Level: This ensures your backplate is straight, adding to the overall appearance.
- Pencil: Great for marking where your screws will go.
If you have these tools on hand, you’re already halfway there! You might also want a friend to help hold things in place while you work, especially if you’re dealing with multiple knobs.
Step-by-Step Installation Process
Now that you have everything ready, let’s walk through the installation process step by step. It’s easier than you might think!
1. Remove the Existing Knob: Start by loosening and removing the knob you want to work with. This usually involves unscrewing a few screws on the back or side. Keep these screws handy; you’ll need them later!
2. Position the Backplate: Hold the backplate up to the door, aligning it with the hole where the knob goes. Use your measuring tape to make sure it’s centered. Mark where the screws will go with your pencil.
3. Drill Holes (if necessary): Most backplates come with pre-drilled holes, but if yours doesn’t, you’ll need to drill some. Ensure that the holes are the right size for the screws you’ll use.
4. Attach the Backplate: Align the plate with your markings and screw it into place. Use the screwdriver to tighten it. Make sure it’s level before fully securing it—this is where the level comes in handy!
5. Reattach the Door Knob: Once the backplate is secure, simply align the knob back into place and use the saved screws to reattach it. Make sure everything feels tight and secure.
And there you have it! Your backplate is now installed and ready to give your door the snazzy upgrade it deserves.
Maintenance and Care for Your Backplates
After installation, you might be wondering how to keep your backplates looking their best. Honestly, maintenance is pretty straightforward. Here are a few tips:
– Regularly Wipe Down: Dust and grime can build up over time, especially on metal backplates. A simple wipe with a damp cloth should do the trick. For wood, just be careful not to soak it.
– Check for Looseness: Every once in a while, give the screws a quick check. If something feels loose, simply tighten it. Regular maintenance helps ensure everything stays in place.
– Avoid Harsh Chemicals: When cleaning, stay away from abrasive cleaners or chemicals that could strip the finish off your backplate.
Taking these small steps will keep your backplates looking fresh and functional for years to come!
Common Issues and Troubleshooting
Even with simple installations, you might run into a few hiccups. Here are some common problems and how to solve them:
– Backplate Doesn’t Fit: If the backplate doesn’t align with the knob or the holes don’t match up, you may need to reposition it. Check your measurements and ensure everything is centered properly.
– Knob is Loose After Installation: If your knob feels wobbly, it could be that the screws aren’t tight enough or that the backplate shifted during installation. Just take a moment to double-check both.
– Not Level: If your backplate looks crooked, it’s often an easy fix. Unscrew it, level it out, and reattach it. Simple adjustments can make a big difference in appearance.
Don’t let these small issues deter you. With patience and a little elbow grease, you’ll have everything looking just right!
Installing backplates for interior door knobs is a simple yet effective way to enhance both the aesthetic and functionality of your doors. They protect your walls, add elegance, and can even tie together your room’s decor. Plus, the installation process is quite manageable, even for beginners.
Take the time to choose the right backplate, gather your tools, and follow the steps we discussed. You’ll not only feel accomplished once it’s done but also enjoy the beauty and protection these little pieces offer. So go ahead and give your doors the upgrade they deserve! Your home will thank you for it.