You might find yourself wrestling with a stubborn door that won’t latch or a handle that spins without catching. If your door uses a *tubular latch* mechanism, you’re in luck! Replacing a worn-out latch isn’t as daunting as it sounds. With a little know-how and some basic tools, you can have your door back in action in no time. Let’s dive into this step-by-step guide, making sure you feel confident to tackle the task like a pro.
Understanding Tubular Latches
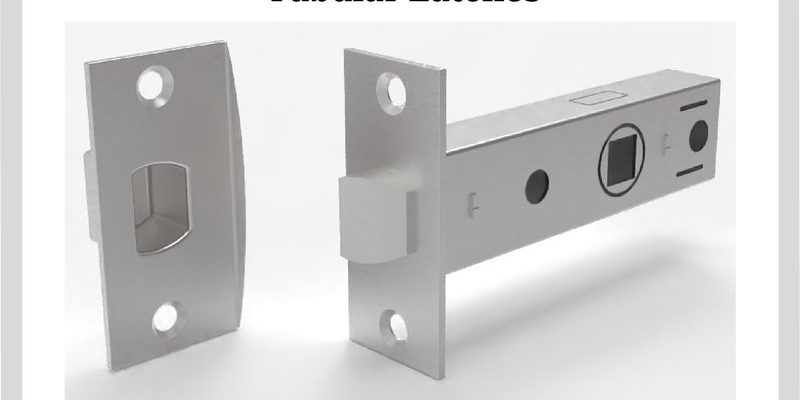
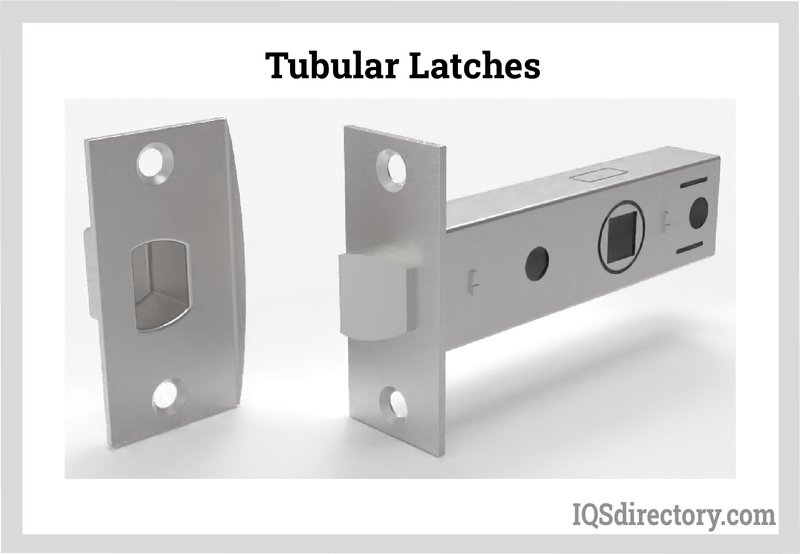
Before we get into the nitty-gritty of replacement, it’s essential to understand what a tubular latch is. Unlike other types of latches that might be more complex, a tubular latch features a simple design, typically consisting of a latch bolt and a spring mechanism housed in a cylinder. This makes it easier to replace—think of it like changing a light bulb rather than rewiring a whole chandelier.
These latches are commonly used in interior doors and can be found in many homes. They operate using a rotating knob or handle, which pulls in the latch bolt, allowing the door to open. Here’s an interesting tidbit: tubular latches come in various sizes and styles, so you’ll want to ensure you’re choosing the right one for your door.
It’s not uncommon for a latch to wear out due to frequent use. Over time, the spring inside can weaken, leading to issues like misalignment or difficulty in closing the door. If you’ve noticed these problems, it might be time for a replacement.
Tools You’ll Need
Before starting, gather your tools. Having everything on hand makes the job smoother and faster. Here’s a handy list:
- Flathead screwdriver
- Phillips screwdriver
- Utility knife (optional)
- Measuring tape
- Replacement tubular latch
Having the right tools makes a world of difference. If you find yourself fumbling around for a screwdriver during the process, it can be quite frustrating. Plus, don’t forget your replacement latch! Make sure it matches the size and style of your current setup. Most hardware stores have staff who can help you find just the right one if you’re unsure.
Removing the Old Latch
Now that you have your tools ready, let’s get started on *removing the old latch*. Here’s how to do it step-by-step:
1. Start by taking off the door handle or knob. Use your screwdriver to unscrew any visible screws. If your handle has a set screw, it may be hidden; look carefully!
2. Disconnect the latch mechanism. Once the handle is off, you can see where the latch connects to the door. Remove any screws holding it in place and pull it out gently.
3. Inspect and measure the old latch. Before tossing it, take a moment to measure it. This will help you confirm that your new latch matches the old one.
Removing the latch can feel a bit like pulling a stubborn weed from the garden. Sometimes it requires a little elbow grease, but with patience, you’ll have it out in no time.
Installing the New Latch
With the old latch out, it’s time to put in the new one. Here’s a simple guide to help you through this part:
1. Insert the new latch into the door. Make sure it sits flush and aligns properly with the hole.
2. Fasten it in place. Use the screws that came with your new latch to secure it. Make sure not to overtighten, as this can strip the holes.
3. Reattach the door handle or knob. Slide it back into place and secure it with the screws.
4. Test the latch. Before you close the door completely, ensure the latch moves smoothly when you turn the handle.
Installing the new latch is similar to putting together a puzzle. Everything has a specific spot, and when it fits, it feels satisfying! Take your time to ensure everything is lined up correctly.
Troubleshooting Common Issues
Sometimes, even after a replacement, things might not work as smoothly as you’d hoped. Here are a few common issues and how to fix them:
– Door doesn’t latch: If the latch isn’t catching, check the alignment. Adjust the strike plate (the metal piece on the door frame) as needed.
– Handle feels loose: Make sure all screws are tightened. If the handle still feels wobbly, you might need a washer or spacer to improve fit.
– Latch sticks: If the latch is sticking, it might need a small dose of lubricant. Opt for a silicone spray that won’t attract dirt.
You might be wondering why these issues crop up even with brand-new parts. Just like a car, components need to function well together. Adjusting and fine-tuning can often resolve these hiccups.
Comparing Standard vs. Tubular Latches
If you’ve ever shopped for door hardware, you might have noticed that there are various types of latches. Standard latches often have a more complex mechanism and might be more challenging to replace than tubular latches. Here’s a quick comparison:
| Feature | Tubular Latches | Standard Latches |
|---|---|---|
| Installation | Easy | Moderate to Hard |
| Common Use | Interior doors | Exterior doors |
| Adjustability | Limited | More adjustable |
When choosing between latches, consider where they’re going to be used. Tubular latches are great for interior doors, while standard latches may better suit external doors due to their strength and durability.
Final Thoughts on Door Latch Replacement
Replacing a worn-out door latch doesn’t have to feel like a daunting task. With the right tools and a little guidance, you can restore your door to its former glory. Plus, doing it yourself not only saves money but also gives you a sense of accomplishment.
Next time you find yourself grappling with a sticky door or a handle that won’t budge, you’ll know exactly what to do. Just remember, every latch has a story, and now you’re equipped to give yours a happy ending. So, roll up those sleeves, grab your tools, and get ready to give your door the TLC it deserves!