Imagine this: you’re standing in front of your door, and every time you open it, it creaks and groans as if it’s telling you a secret. You might be wondering, “Is it time to call a professional?” Not necessarily. With the right approach, you can fix it yourself and save some money. Let’s break down the steps to repair that hinge leaf, and by the end of this article, you’ll feel more confident tackling this home improvement task.
Understanding the Hinge Leaf
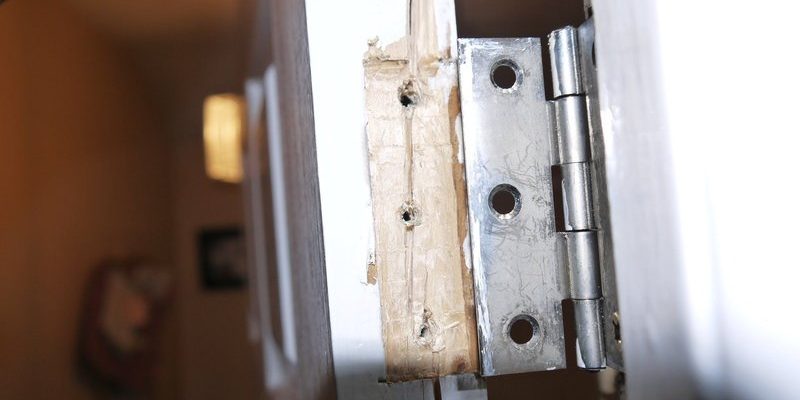
Before jumping into repairs, let’s familiarize ourselves with what a hinge leaf actually is. Each door hinge has two parts called leaves. One leaf is attached to the door, while the other connects to the door frame. When the door swings open and closed, these leaves work together to allow smooth movement. A broken hinge leaf can result from wear and tear, improper installation, or even too much weight on the door.
You’ll typically notice issues with the hinge leaf when the door starts to droop or doesn’t close properly. Cracks or breaks in the leaf can throw everything off balance. Recognizing a broken hinge leaf is like spotting a flat tire; you know it needs attention before it gets worse.
Gathering Your Tools
To repair a broken hinge leaf, you’ll need a few supplies. Here’s a quick shopping list:
- Replacement Hinge Leaf: Make sure to get one that matches your existing hinges.
- Screwdriver: A handy tool for removing and attaching screws.
- Wood Glue: This can help reinforce a damaged hinge leaf.
- Wood Fill: Useful for filling in gaps or cracks.
- Drill: Optional, but speeds up the installation process.
Once you have your materials ready, you can approach this task with confidence. Honestly, having the right tools is half the battle won!
Removing the Damaged Hinge Leaf
Now that you’re armed with tools, let’s get to work. The first step is to remove the broken hinge leaf from the door. Start by propping the door open at a comfortable angle. You might want to ask someone for help to hold the door steady while you work.
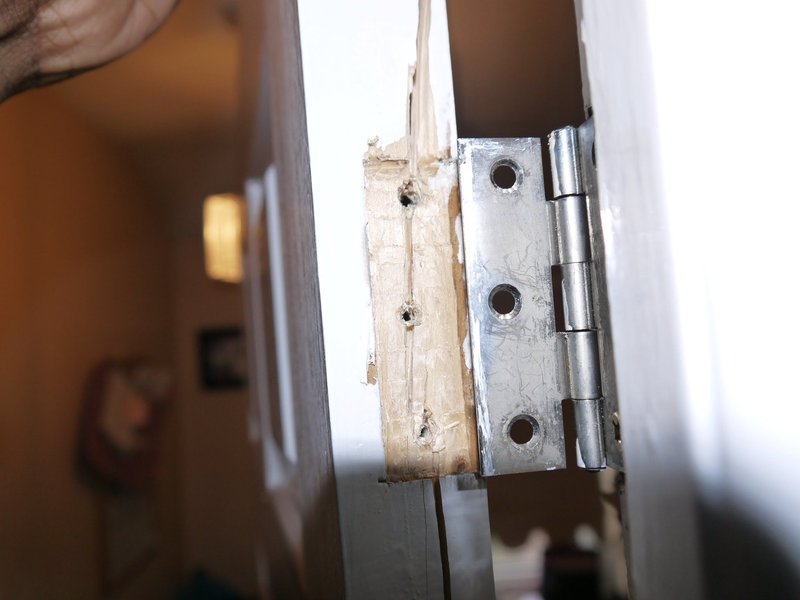
Using your screwdriver, remove the screws holding the broken leaf. If the screws are stripped or stuck, a little finesse (and perhaps some penetrating oil) may be required. Once you free the hinge leaf, take a close look at the remaining screw holes. Are they stripped? If so, don’t panic—there are ways to fix that.
Fixing Stripped Holes
If you find that the screw holes are stripped, you’ll need to repair them before installing the new hinge leaf. Here are a couple of options to consider:
1. Toothpicks and Glue: This is a simple method. Just dip a toothpick in wood glue, insert it into the stripped hole, and break it off even with the surface. Once the glue dries, you can reinsert the screws.
2. Wood Dowels: For a sturdier fix, drill out the hole to fit a wood dowel. Insert the dowel into the hole with glue. Once it’s dry, you can drill a new hole for your screw.
Both methods work effectively to give the screw a strong hold again. You’ll feel accomplished knowing you’ve tackled this common problem!
Installing the New Hinge Leaf
With the old hinge leaf removed and the holes fixed, it’s time to install the new hinge leaf. Align it carefully with the existing holes. If you’ve used the wood dowel method, make sure to drill a new hole at the correct angle to avoid any mishaps.
Start by inserting the screws into the new hinge leaf, tightening them with your screwdriver. Be careful not to overtighten, as this can strip the screws again or damage the wood. You want the hinge to be secure but still functional.
As you attach the hinge, double-check the alignment. Here’s the thing—if the hinge isn’t straight, your door won’t function properly.
Testing Your Door
Once the new hinge leaf is securely in place, it’s time to test your door. Gently open and close it a few times to ensure it functions smoothly. Listen for any creaking sounds—if you hear them, you may need to adjust the hinge slightly. Proper alignment is critical; a misaligned door can lead to further issues down the line.
If your door opens and closes as it should without any struggle, congratulations! You’ve just repaired a broken hinge leaf like a pro.
Maintaining Your Hinges
Now that you’ve repaired the hinge leaf, it’s essential to keep an eye on it and maintain the hinges regularly. Here are a few tips:
– Lubricate: Every few months, apply a drop or two of lubricant to the hinges. This helps prevent rust and keeps them moving smoothly.
– Check Alignment: Periodically check the door’s alignment. If it starts to sag again, it might be time for another quick fix.
– Watch for Wear: Keep an eye out for signs of wear on your hinges. If you notice any unusual noises or sagging, address it before it becomes a bigger issue.
By taking these simple maintenance steps, you can extend the life of your door hinges and avoid future repairs.
Repairing a broken hinge leaf on an interior door may seem daunting at first, but with the right tools and a little elbow grease, you can do it yourself. This small repair can save you time and money while keeping your home functional and beautiful. So, the next time your door starts to squeak, remember that you’ve got the skills to fix it. And who knows? You might even impress your friends with your newfound DIY expertise! Happy repairing!