Think of your door hinges as the backbone of the door’s operation. When they’re out of alignment, the door can sag or even drag on the floor. But don’t worry! With a few simple tools and a bit of patience, you can fix this problem yourself. Trust me, tackling this home improvement project will not only save you money but also give you a great sense of accomplishment.
Understanding Door Sagging
Door sagging happens when the door doesn’t hang squarely in its frame. This can occur for several reasons: the door is too heavy for its hinges, the hinges are worn out, or even changes in humidity and temperature can warp the door or frame. Just picture it: you open the door, and instead of gliding smoothly, it scrapes against the floor like a stubborn toddler refusing to leave a fun play area.
When you take a closer look, you might notice that one side of the door seems to be lower than the other, which is a clear indicator that it’s time for some adjustment. Ignoring the issue could lead to further problems, like jamming or even damage to the door or frame. So, how do you get started?
Gather the Necessary Tools
Before diving into the adjustment, it’s crucial to have the right tools at your side. You don’t want to find yourself halfway through and realize you’re missing something. Here’s a quick list of what you’ll need:
- Phillips head screwdriver
- Flathead screwdriver
- Wood shims (optional)
- Tape measure (for precise adjustments)
- Level (to check the alignment)
Having everything ready beforehand makes the process smoother and saves you from unnecessary interruptions. Honestly, there’s nothing worse than stopping your flow to hunt down tools.
Assessing the Problem
Now that you’ve got your tools, it’s time to assess the situation. Start by inspecting the door in its closed position. Look closely at the gaps between the door and the frame. Are they even? Is there a noticeable gap at the top or bottom on one side? This simple visual check will help you determine how much adjustment is needed.
Next, grab your level and place it against the door. This tool will help you see if the door is sitting flat, or if it’s tilted. If the bubble in the level is off to one side, that’s a pretty clear sign of sagging. You might be wondering how much adjustment you need to make. Don’t worry; we’ll tackle that next.
Adjusting the Hinges
Now for the fun part! To actually adjust the hinges, follow these steps:
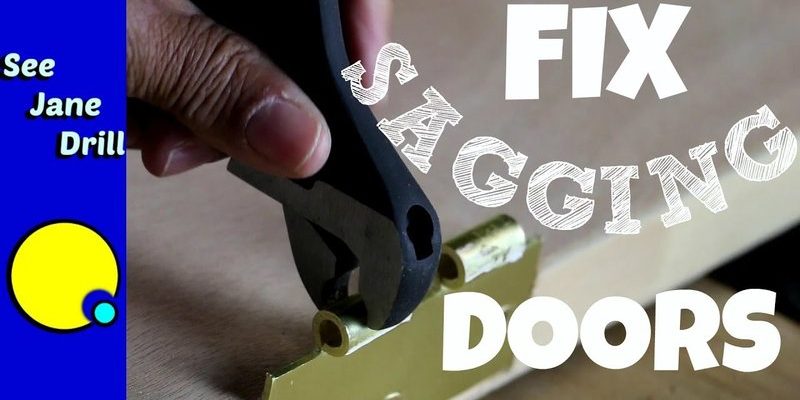
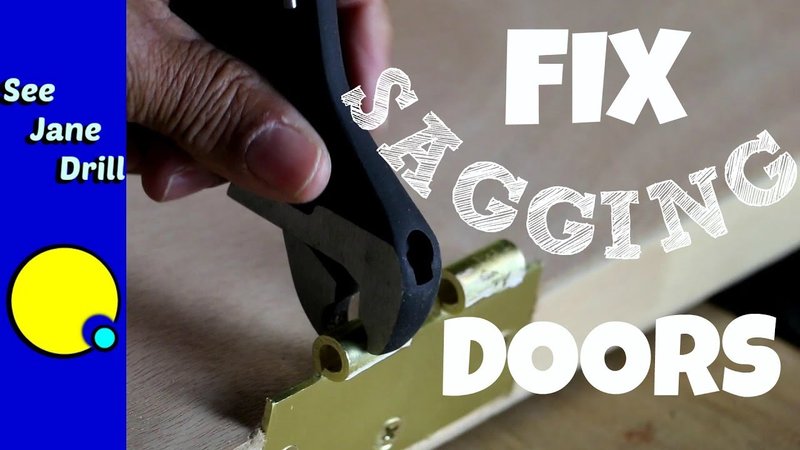
1. Identify the hinges: Usually, there are two or three hinges on a door. Check to see which one appears to be the culprit. It’s often the top hinge that needs a tweak.
2. Loosen the screws: Using your Phillips head screwdriver, gently loosen the screws holding the hinge to the door and the frame. You don’t need to remove them completely—just enough so the hinge can move slightly.
3. Lift the door: With a friend’s help (or with a little creativity using a block or shim), lift the door at the side where it’s sagging.
4. Tighten the screws: While holding the door in its corrected position, tighten the hinge screws back in. You should feel the hinge grip the door now that it’s aligned properly.
5. Test the door: Swing the door open and closed a few times. Check if it’s still sagging or if it needs another minute of adjustment.
If you find that the door is still misaligned after these steps, consider adding a shim behind the hinge. This can raise the hinge slightly, providing extra support.
Using Shims for Extra Support
Sometimes, your door may need a little extra help. That’s where shims come into play. Think of shims as tiny superheroes for your sagging door. If after adjusting the hinges, you still notice that your door isn’t perfect, you can place shims behind the hinges to prop them up.
To do this:
1. Remove the hinge screws: Just like before, start by taking out the screws.
2. Insert the shim: Place the shim behind the hinge. You might need two or more, depending on how much support it needs.
3. Reattach the hinge: With shims in place, reattach the hinge and tighten the screws.
4. Check the alignment: Do another quick test to see if this adjustment has made a difference.
Shims are a great way to fine-tune your door alignment and can be a quick solution when the hinge adjustment alone doesn’t cut it.
Maintaining Your Door’s Alignment
Now that you’ve successfully adjusted the hinges and your door is looking great, it’s important to maintain that alignment. Here are a few tips to ensure your door stays in good shape:
– Regular checks: Periodically check the hinges. If your door starts to sag again, you’ll be able to address it early.
– Avoid heavy impacts: Be mindful of slamming the door or putting extra weight on it. This can lead to further misalignment.
– Watch for humidity: Changes in humidity can cause your door to warp. If your area experiences high humidity, consider using a dehumidifier or ensuring proper airflow.
You might think that a little door adjustment isn’t a big deal, but imagine being able to swing your door open and closed with ease. It’s a small change that can make your daily life a lot smoother.
Fixing a sagging door by adjusting the hinges is a straightforward task that can save you from the annoyance of a door that sticks or drags. By gathering the right tools, assessing the problem, and making a few simple adjustments, you can enjoy a door that works smoothly once again.
So, the next time you see that door leaning like it’s been on a long journey, remember these steps. You’ve got this! With a little effort, you can restore any door to its rightful place in the frame, making your home feel a bit more welcoming. Happy DIY-ing!