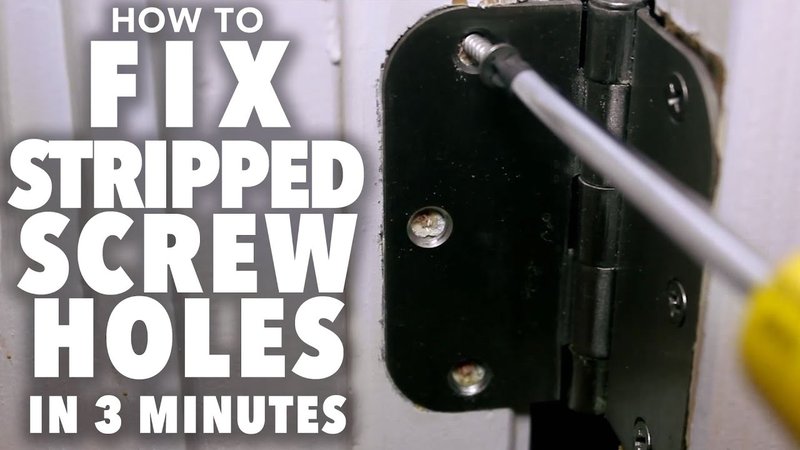
Most of the time, this happens on older doors or after a few rounds of home improvement projects. Maybe it’s a reliable Schlage or Kwikset locks—these are premium brands, but even the best handlesets aren’t immune to a stripped screw hole. Fortunately, you don’t have to call a locksmith or buy a whole new handleset just because of this. With a little patience and the right fix, you can get that hole gripping tighter than ever.
Let’s walk through what’s going on, why it matters, and—step by step—how to repair a stripped screw hole on an exterior handleset so your door hardware stays safe and secure.
Why Do Screw Holes Get Stripped On Exterior Doors?
Honestly, stripped screw holes happen more often than you might think, especially on exterior doors. First, exterior handlesets get a lot of use—people are coming and going all day, slamming the door, leaning on the hardware. Over time, all that force puts stress on the screws and the wood or metal they’re anchored into.
You might be wondering, “Isn’t exterior hardware built to withstand this?” Yes, but even top brands like Schlage and Kwikset can only do so much if the underlying door material starts to give. If you’ve ever installed or swapped out door hardware, you know how tempting it is to over-tighten those tiny screws—thinking it’s making things more secure. The truth? That’s one of the fastest ways to strip the hole, especially in softer wood.
Weather is also a big factor. Exterior doors face humidity, temperature swings, rain, and sun. All those elements can make the door material expand and contract, weakening the screw holes over time. And if you’ve ever done a battery change or tried to sync, reset, or troubleshoot smart locks, you know that handlesets get messed with more often these days, which just speeds up the wear.
How To Tell If A Screw Hole Is Stripped
So, how do you know for sure that the screw hole is stripped, and not just that the screw is loose? Here’s the thing: a stripped hole usually won’t “bite” the screw at all. You’ll feel it instantly when you try to tighten—the screw just spins and spins without pulling the plate or handleset tight to the door.
You might notice the handle feels wobbly, or the screws seem to slide in and out way too easily. Sometimes, you’ll even see the screw pop out slightly after you try to secure it. If you try a fresh screw and it still won’t tighten, that’s a dead giveaway.
Let me explain another sign: if you removed the screw completely and peeked inside the hole, you might see slivers of wood or metal shavings, or the hole might look a bit too wide. On a metal door, you might spot shiny worn-out threads. All of these point to a stripped screw hole that’s not going to hold hardware securely until it’s repaired.
What You’ll Need To Repair A Stripped Screw Hole
Before you start, grab a few simple tools and supplies. Think of this like putting together a little “screw hole troubleshooting kit.” Most of these are things you probably have in the house, especially if you’ve done any kind of battery or remote repairs, or basic DIY.
- Wood glue or wood filler (for wood doors) or epoxy (for metal doors)
- Wooden toothpicks, golf tees, or matchsticks
- Small flathead screwdriver or utility knife
- New screws (preferably a bit longer or thicker, if the old ones are too worn)
- Drill and bits (optional, for tough cases)
- Screwdriver (manual or powered, for re-installing the handleset)
- Sandpaper (optional, for smoothing the repair)
You might not need every single item, but it’s good to have options. For example, if you’re fixing a universal handleset, or a brand-specific model like Kwikset, you might notice different screw sizes—so having spare screws in different lengths helps cover your bases.
Step-By-Step: How To Fix A Stripped Screw Hole On A Handleset
Let’s get into the actual repair. You might be surprised by how simple this process can be. Honestly, the hardest part is waiting for glue or filler to dry if you’re in a hurry.
- Remove the handleset. Unscrew the exterior handleset and set the hardware aside. Take the time to check for any loose or worn parts—sometimes the stripped hole isn’t the only issue.
- Clean out the stripped hole. Use a flathead screwdriver or something similar to remove any loose debris, flakes, or crumbled wood. If you see any “fuzzy” material inside, clear it out so the new filler has a clean surface to grip.
- Fill the hole (for wood doors). Push several wooden toothpicks, matchsticks, or a golf tee dipped in wood glue into the stripped hole. Pack them in tightly so they really fill the space. Use a utility knife to trim the excess so it’s flush with the surface. For bigger holes, use wood filler instead. Let the glue dry thoroughly (check the label for timing—usually about an hour).
- Fill the hole (for metal doors). Mix up a bit of two-part epoxy and fill the hole according to package instructions. Wait for it to cure fully—it needs to be rock hard before you drill or screw into it again.
- Re-drill a pilot hole (if needed). For a super-tight fit, use a small drill bit to make a new pilot hole right in the center of the repair. This helps the screw thread grip again.
- Re-install the handleset. Use a fresh screw (longer or thicker if possible) and carefully thread it into the repaired hole. Secure the handleset as you normally would—don’t over-tighten, just make it snug. Test the hardware by pulling and pushing to make sure it’s solid.
You might be tempted to skip steps or use whatever glue is handy, but trust me: using the right materials makes or breaks the repair.
Alternatives For Severe Or Repeated Damage
Here’s the thing—not every stripped screw hole can be fixed with toothpicks and glue, especially if the damage is extensive. Maybe you’ve already tried the DIY methods above, or maybe the hole is so blown out that nothing seems to grip.
In those cases, you’ve got a few choices:
- Use a screw anchor or dowel. For bigger holes, inserting a plastic or metal screw anchor, or gluing in a wooden dowel, gives your new screw something solid to bite into. Just drill out the hole a bit, insert the anchor or dowel with glue, let it set, and then re-drill your pilot hole.
- Move the screws. If the hole is beyond saving—and if the handleset design allows—you might be able to drill a new hole a short distance away, then mount the plate and hardware there. This isn’t always possible, but on universal handlesets, you sometimes get a bit of wiggle room on where the screws go.
- Upgrade the hardware. Sometimes, it’s just time for a new handleset, especially if the current one is worn out or the internal mechanisms are failing. Many modern Schlage and Kwikset models even offer improved anchoring screws or built-in mounting plates that help avoid stripping in the future.
If you’re not sure what’s best, it’s never a bad idea to ask for advice at a hardware store or consult a pro before making big changes.
Tips To Prevent Stripped Screw Holes In The Future
You repaired the hole—so how do you stop this from happening again? Honestly, most stripped screw holes are totally preventable with a little care and the right approach.
- Don’t over-tighten. The urge to “crank it down” is strong, but hand-tight is usually enough. Use a manual screwdriver for the final turns to avoid going too far.
- Check for fit before installing. If a screw feels loose going in, don’t force it. Try a slightly thicker or longer screw for a better grip.
- Monitor weather exposure. If your door is exposed to a lot of rain or humidity, keep an eye out for swelling or warping. If hardware starts to feel loose, fix it quickly instead of letting it get worse.
- Regular maintenance. Every few months, check your handleset—especially after big weather swings or lots of use (like a party or move-in day). Catch small problems fast before they turn into big ones.
Think of it like caring for your car: a little attention now and then keeps things running smoothly and saves you headaches in the long run.
When To Call A Professional For Handleset Repair
Let’s be honest—not everyone loves doing hands-on repairs, and sometimes you just don’t have the tools, time, or patience. There’s also the situation where, no matter what you try, the repair just isn’t holding.
Here are a few signs it’s time to hire a locksmith or handyman:
- The stripped hole is in metal and you don’t have the tools to drill or apply epoxy.
- The repair keeps failing—maybe the door itself is rotting or splitting.
- The handleset has electronic or smart lock components you’re not comfortable troubleshooting or resetting. (Some Schlage or Kwikset smart locks require specific battery removal, code resets, or sync procedures if you need to completely uninstall and reinstall.)
- The hardware is under warranty and attempting repairs could void it.
If you do call a pro, let them know exactly what you’ve tried. It can actually save them time and you, money.
Final Thoughts On Fixing Stripped Screw Holes In Handlesets
Dealing with a stripped screw hole on your exterior handleset can feel like one of those little home maintenance problems that’s somehow both annoying and stressful. But with the right approach—and a bit of patience—you can usually handle it yourself and get your door hardware back to working order.
Whether you’re patching up a Schlage entry lock, troubleshooting a loose Kwikset, or repairing a universal handleset, the core steps are the same: fill the hole with something sturdy, let it set, and start fresh with a new screw. Take your time, use the right materials, and don’t hesitate to call a professional if things get out of hand.
In the end, keeping your exterior handleset secure is about more than just curb appeal—it’s about safety, comfort, and making sure your home is as durable as you are. Stay curious, stay handy, and you’ll be ready for whatever little repairs come your way.
