
Most key cylinder replacements aren’t as intimidating as they sound. Whether you’ve got a classic Schlage, Kwikset, Yale, or some other popular brand, the steps and parts look pretty similar. The key is slowing down and knowing what to expect. As someone who once stared at the screws on a deadbolt for an hour before realizing they were hidden under a decorative plate—believe me, a little patience and the right instructions make all the difference.
What Is a Keyed Cylinder and Why Replace It?
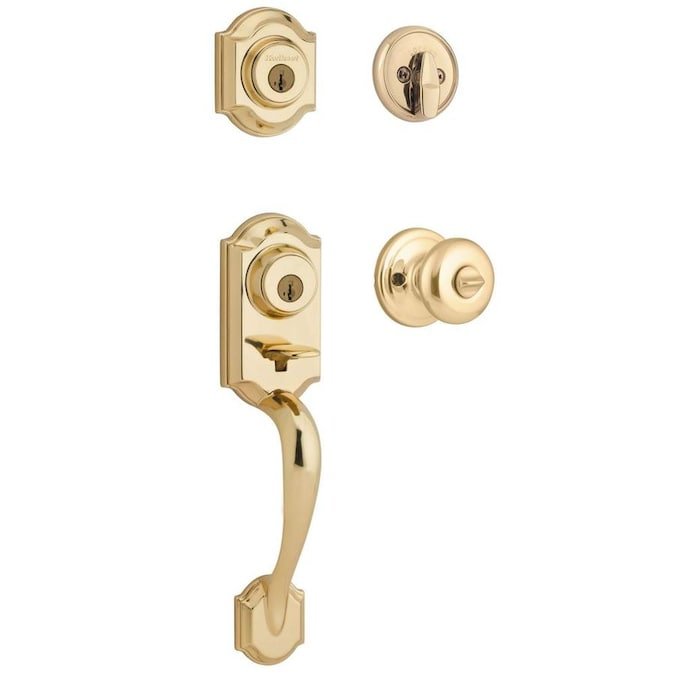
The keyed cylinder is the main part of your entry door lock that interacts with your key. It’s basically the “lock core”—when you insert your key and twist, it turns the cylinder, moving the locking mechanism inside the door. Without this small but mighty piece, your fancy handleset is, well…just a handle.
You might be wondering why someone would swap it out instead of just getting a new key. Here’s the thing: If you’ve lost your keys, moved into a new home, or the lock starts sticking, replacing the cylinder lets you keep the rest of your handleset. It’s often faster and less expensive than calling a locksmith or replacing your entire lock. Also, if you want all your locks to use the same key, you can match up new cylinders and forget about fumbling with a heavy keyring.
Some brands, like Schlage and Kwikset, make it pretty easy to find replacement cylinders—just make sure to match the brand and type (single or double cylinder) to your current handleset for a smooth swap.
Signs Your Entry Door Cylinder Needs Replacing
A failing cylinder doesn’t always stop working overnight. Often, you get little warning signs first. Maybe the key sticks, the lock takes extra pressure to turn, or it feels gritty inside. Sometimes, the entire lock can turn with the key but doesn’t actually move the latch or deadbolt.
If you’ve ever tried to let yourself in late at night, only to spend five minutes jiggling a stubborn lock, you know how frustrating this can be. These problems can be caused by worn springs, gummed-up pins, or just years of use. In some cases, the cylinder can “seize up” completely, making your key useless.
Another reason people replace cylinders is security. If you’ve lost a key, had a roommate move out, or want to upgrade to a cylinder that supports newer key codes or smart lock systems, swapping just this part lets you keep your handleset but reset your peace of mind.
Tools and Parts You’ll Need for the Job
Before you start, it pays to gather everything you need. Trust me, running back and forth for missing tools only adds to the frustration. Here’s a basic list for most entry door handlesets:
- Replacement keyed cylinder: Match the brand and type (e.g., Schlage single-cylinder, Kwikset SmartKey, etc.)
- Phillips and flathead screwdrivers
- Measuring tape or ruler (to check cylinder length if unsure)
- Needle-nose pliers (sometimes handy for tight spots)
- Your current key (for removing some types of cylinders)
Some handlesets also hide their screws behind decorative covers. If your model has these, a small flathead screwdriver helps pop the plate off without scratching the finish. For certain smart or high-security locks, you might find a unique screw or *reset* tool is needed—check the instructions before you start.
If you don’t know your handleset’s model or brand, look for markings near the latch or on the edge of the door. If all else fails, snap a photo and compare it at the hardware store or with your online order.
Removing the Old Keyed Cylinder
Honestly, the trickiest part of this process is often just getting access to the cylinder. The steps below work for most standard brands like Schlage and Kwikset, but always check for brand-specific quirks.
Step 1: Remove the Handleset Interior Plate
On the inside part of the door, you’ll usually see a plate or knob that covers the screws. Some plates pop off gently with a flathead screwdriver. Others have visible screws. Take these off first—you’ll usually need a Phillips screwdriver.
Step 2: Unscrew and Detach the Handleset
With the plate removed, you’ll see the screws that hold the handleset together. Unscrew them and set them somewhere safe (a mug or small bowl works wonders—those little screws roll away fast). Gently separate the handleset halves.
Step 3: Remove the Cylinder Retaining Screw
Here’s where things get brand-specific. You’ll find a screw or small clip that holds the cylinder in place—typically on the edge of the door or directly under the latch. Take this out, and the cylinder should slide out with a little wiggling. If it’s stuck, work it free with pliers, but don’t force it so hard you damage the door.
If you hit a snag—say, a screw that seems “stripped” or a plate that won’t come off—try a dab of WD-40 or ask a hardware pro for tips. Patience beats brute force every time.
Installing the New Keyed Cylinder
Once the old cylinder is out, breathe easy—the trickiest part is over. Let’s walk through the rest.
Step 1: Match the New Cylinder
Hold your new and old cylinders side by side. They should match in length and shape, and the tailpiece (the part that moves the latch) should be the same size and orientation. If you’re using a universal or adjustable cylinder, follow the brand’s instructions to set the length.
Step 2: Insert the Cylinder
Slide the new cylinder into the door, making sure the tailpiece lines up with the latch mechanism. You may need to gently jiggle it to fit. When it “catches” and sits flush, you’re in business.
Step 3: Secure the Cylinder With the Retaining Screw
Replace the screw or clip that holds the cylinder in place. Don’t overtighten—snug is perfect. If it feels loose, something may be misaligned.
Step 4: Reassemble the Handleset
Line up the handleset halves and tighten the connecting screws. Snap or screw the interior plate back on. Give it a once-over for a snug fit.
Pro tip: Always check the function before finishing assembly. Insert your key and make sure the cylinder turns the latch smoothly from both sides. If it sticks, remove and try realigning.
Testing and Troubleshooting Your New Handleset Cylinder
Once everything’s back in place, grab your new key and give it a test run. Turn it gently—if it locks and unlocks without sticking, you’re good. But what if it’s still acting up? Don’t panic.
- If the key won’t go in: Double-check you have the right cylinder, and that there’s nothing blocking the keyhole.
- If the key goes in but won’t turn: The tailpiece might not be seated right, or the cylinder isn’t oriented correctly with the latch mechanism. Loosen and realign.
- If the lock turns but doesn’t engage: This usually means the tailpiece isn’t connecting with the latch. Try reseating the cylinder, or switch to a longer tailpiece if needed (some universal kits give you options).
If you’re upgrading to a smart or coded handleset, be sure to follow any extra steps for *syncing*, *pairing*, or *resetting* the electronics before finalizing the install. Keep the old keyed cylinder around for a few days just in case you need to reference it or swap back temporarily.
Comparing Universal and Brand-Specific Replacement Cylinders
Shopping for a replacement cylinder, you might notice some options labeled as “universal fit,” while others are brand-specific (like Schlage, Yale, or Kwikset). Honestly, the right pick depends on your door and how much you want to tinker.
- Brand-Specific Cylinders are made to fit your exact handleset, so installation is usually easier. They’re perfect if you want a quick, no-fuss swap—just match the model number and you’re set.
- Universal Cylinders can be adjusted for length or tailpiece style, making them handy for custom doors or older handlesets. But these can require more trial-and-error with fitting, and the instructions can be, well, less than clear.
If you’re not sure, bring the old cylinder (or a detailed photo) to the hardware store. Staff can usually spot tiny differences that matter, like screw placement or locking mechanism type. And remember—swapping a cylinder is a DIY job, but you don’t have to “tough it out” if you feel stuck; a locksmith can help match and install for a reasonable fee.
Extra Tips for a Smooth Cylinder Replacement
Here are some small things that can make this job a whole lot easier:
- Read the instructions with your new cylinder. Even if you’ve done it before, brands sneak in small changes over time.
- Keep track of tiny screws in a dish or cup. You’ll thank yourself when it’s time to reassemble.
- Tape up the latch plate with painter’s tape if you’re worried about scratching your door’s finish.
- Label your keys and extra parts. If you’re doing more than one door, things get mixed up fast!
- If you run into a stubborn screw, use a bit of *penetrating oil* and let it sit for a few minutes—don’t strip it by forcing your screwdriver.
Don’t be afraid to take photos at each step with your phone. If something doesn’t fit on reassembly, you can check where everything went the first time. You’d be surprised how often this saves the day.
Wrapping Up: Fresh Security Without the Hassle
Changing the keyed cylinder on your entry door handleset isn’t just about fixing a sticky lock—it’s about making your home feel secure again without spending a fortune or struggling through confusing steps. Once you get the hang of removing a handleset and fitting a new cylinder, you’ll feel way more confident handling all sorts of lock maintenance, whether you’re syncing a smart lock, rekeying after a move, or just making sure your family has working keys.
Take your time, double-check the fit, and don’t be afraid to ask for help at your local hardware store if a part looks strange or you need clarification. With a few tools, a bit of patience, and these instructions, you’ll have your entry door working like new—and you might just get a little rush of DIY satisfaction every time you turn that key.